Tips for Planting Easter Lilies Outside

Standard


Many people love to decorate homes and churches with beautiful Easter lilies.  Once the flowers bloom and the petals fall some simple tips can preserve your Easter lily to bloom again.  Check out this informative peace on planting Easter Lilies!

Green Circle Growers Blog

Tips for Planting Easter Lilies Outdoors

Green Circle Growers – Thursday, April 21, 2011

The traditional Christian symbol of Easter, white trumpet-shaped Easter lilies symbolize hope, purity and rebirth. These “white-robed apostles of hope,” as they are often called, are said to have sprung up in the Garden of Gethsemane to mark the spots where Jesus Christ’s sweat fell during his final hours.

Easter Lilies (Lilium) fade, they can be planted outdoors. With proper care, Easter lilies can thrive and bloom again next spring. To prepare your lily for outdoor planting, pinch off blooms when they fade. Allow foliage to die back naturally to reenergize the bulb. Lilies do best when planted in the spring or fall when the plant is dormant. Until it can be planted outdoors, continue to water the dying plant regularly to prevent the bulb from drying out.

When all danger of frost has ended, trim off dead foliage and plant lily bulbs outdoors. Bulbs should be planted six inches deep in well-drained soil. Lilies need plenty of direct sunlight, so place bulbs in a sunny location. Because lilies are not drought-tolerant, they must be watered frequently during dry periods from spring through fall. Mulching over lily beds will help conserve moisture and provide a cool root environment. New growth should begin to emerge next April. When growth is about 3 inches above ground level, fertilize with a 5-10-10 fertilizer (higher phosphorus than nitrogen).


http://www.greencirclegrowers.com/_blog/Green_Circle_Growers_Blog/post/Tips_for_Planting_Easter_Lilies_Outdoors/


Flower Bed TLC…Let Lawns by L.E.W. do it for you! 248.217.4417

Standard

Flower beds are a garden staple, providing color and a wide range of shapes and sizes to the landscape. Proper upkeep of the flower bed is essential for a long-lasting, healthy garden. Seasonal care through pruning and watering is needed for optimal growth to ensure prolonged flowering. Stick to a regular maintenance plan to keep the flower bed tidy and prevent the plants from overgrowth or spreading too much throughout the garden. With a little pre-planning, your flower beds can create constant color and beauty in the landscape.

o    1

Apply fertilizer in spring as new growth starts with a general purpose fertilizer like 10-10-10. Follow up with another application in six weeks to eight weeks, especially for perennial flowers with long lasting foliage or extended flowering periods.

o    2

Remove weeds from the flower beds when they appear. Use a trowel and dig up the entire root ball of the weed to ensure it does not grow back.

o     

Dozens of stunning patio photos to help you get inspired.

lonny.com/patio-photos

o    3

Water established flower beds when the soil is dry two to three inches deep. Water the entire root zone area in early morning. Let the flowers dry out partially before watering again and only apply water as fast as the soil can absorb the moisture. Turn off the water if the soil begins to puddle.

o    4

Spread a fresh layer of mulch around the bed to help conserve moisture and maintain soil temperature, as well as prevent weeds from sprouting up and taking up needed nutrients.

o    5

Deadhead all spent flower blooms as soon as they are noticeable to encourage a second round of blooms. Prune any dead material off of the flower with pruning shears.

o    6

Divide perennial plants in spring, when new growth resumes. Dig up around the flower and lift the entire clump from the ground. Using a garden spade, cut up the clump so that each clump is the size of a gallon or quart sized perennial. Discard the old center and trim off the damaged roots.

o    7

Prune the perennial flowers back in late winter or early spring before new growth begins. Remove and discard all annual flowers that are dead.


Lawns by L.E.W. would LOVE to give your flower beds some TLC!  Call us for seasonal color changes and all your lawn maintenance needs!  248.217.4417.

Read more: http://www.ehow.com/how_7662932_maintain-flower-beds.html#ixzz2z96dvhlJ

PRUNING 101…Lawns by L.E.W. can do this for you! 248.217.4417

Standard


PRUNING: PRUNING HEDGES   MG Manual Reference 
Ch. 8, pp. 12 – 16
 

Hedges consist of plants set in a row so as to merge into a solid, linear mass. They have served gardeners for centuries as screens, fences, walls, and edgings.

Hedge Pruning
Hedge Pruning
Incorrect
Correct
Correct

A well-shaped hedge is no accident. It must be trained from the beginning. The establishment of a deciduous hedge begins with the selection of nursery stock. Choose young trees or shrubs 1 to 2 feet high, preferably multiple-stemmed. When planting, cut the plants back to 6 or 8 inches. This will induce low branching. Late in the first season or before bud-break in the next, prune off half of the new growth. In the following year, again trim off half the new growth to encourage branching.

In the third year, start shaping. Hedges are often shaped with flat tops and vertical sides. This unnatural shaping is seldom successful. The best shape, as far as the plant is concerned, is a natural form — rounded or slightly pointed top with sides slanting to a wide base. After plants have been pruned initially to induce low branching, the low branching will be maintained by trimming the top narrower than the bottom, so that sunlight can reach all of the leaves on the plant.

Snow accumulates on broad flat tops Straight lines require more frequent trimming

shapes

Peaked and rounded tops hinder snow accumulation Rounded forms, which follow nature’s tendency, require less trimming

Rounded or peaked tops aid shedding snow, which if left, may break branches. Before shaping, some thought should be given to the shape of the untrimmed plant. For example, naturally conical arborvitae does particularly well in a Gothic arch shape. Common buckthorn, a spreading plant, is more easily shaped to a Roman arch.

Trim to the desired shape before the hedge grows to the desired size. Never allow the plants to grow untrimmed to the final height before shearing; by that time it will be too late to get maximum branching at the base. After the hedge has reached the dimensions desired, trim closely in order to keep it within bounds.

Evergreen nursery stock for hedging need not be as small as deciduous material, and should not be cut back when planted. Trim lightly after a year or two. Start shaping as the individual plants merge into a continuous hedge. Do not trim too closely, because many needle-bearing evergreens do not easily generate new growth from old wood.


These questions often arise: “How often should this hedge be trimmed?” and “When should I trim?” Answers depend to some extent on how formal an appearance is desired. In general, trim before the growth exceeds 1 foot. Hedges of slow-growing plants, such as boxwood, need trimming sooner. Excessive untrimmed growth will kill leaves beneath, and also pull the hedge out of shape. This is especially true with weak-stemmed shrubs. In the mountain and cooler areas, yews and other evergreens may need shearing only once annually, and then not before July; in milder areas, two or even three shearings may be necessary. Deciduous material should be trimmed earlier than July, but after the spring flush of new growth, and will often need to be trimmed once or twice more. Frequency depends on the kind of shrub, season, and degree of neatness desired.


What can be done with a large, overgrown, bare-bottomed, and misshapen hedge? If it is deciduous, the answer is fairly simple. In the spring, before leaves appear, prune to one foot below the desired height. Then trim carefully for the next few years to give it the shape and fullness desired. Occasionally, hedge plants may have declined too much to recover from this treatment; replacing them may be necessary.


Rejuvenating evergreen hedges is more difficult. As a rule, evergreens cannot stand the severe pruning described above. Arborvitae and yew are exceptions; other evergreen hedges may have to be replaced.


What tools should be used to trim hedges? The traditional pair of scissor-action hedge shears is still the best all-round tool. It will cut cleaner and closer than electric trimmers, which often break and tear twigs. Hand shears can be used on any type of hedge, while electric trimmers do poorly on large-leaved and wiry-twigged varieties, and sometimes jam on thick twigs. Hand shears are also quieter and safer, less likely to gouge the hedge or the operator. Hand pruners are useful for removing a few stray branches. Larger branches can be removed with loppers and/or a pruning saw.


Pruning RosesTop

All roses need some type of pruning. If roses are not pruned for a number of years, plants deteriorate in appearance, often develop more than the usual disease and insect problems, and the flowers become smaller and smaller.


Hybrid Tea, Grandiflora, and Floribunda roses require annual pruning in the spring, after winter protection has been removed. As a guideline, follow the old saying that roses are pruned when the forsythia blooms. If rosebushes are pruned too early, injury from repeated frost may make a second pruning necessary.


The only tools necessary are sharp hand pruners and gloves. If the rose collection is large, a small saw and loppers will also help. Loppers are used to cut out large dead canes.


Remove branches that are dead, damaged, diseased, thin, weak, growing inward, and cross or interfere with other branches. Proper pruning encourages new growth from the base making the plant healthy, attractive, and result in large blossoms. Cut at least 1 inch below damaged areas. Remove all weak shoots. If two branches rub or are close enough that they will do so soon, remove one. On old, heavy bushes, cut out one or two of the oldest canes each year.


Cut back the remaining canes. The height to which a rose should be cut will vary depending upon the normal habit of the particular cultivar. The average pruning height for Floribundas and Hybrid Teas is between 12 and 18 inches, but taller growing Hybrids and most Grandifloras may be left at 2 feet.


Make cuts at 45-degree angles above a strong outer bud. Aim the cut upward from the inner side of the bush to push growth outward and promote healthy shoots and quality flowers.


Other types of roses have special pruning needs:


rose standard, or tree rose, is a Hybrid Tea, Grandiflora, or Floribunda budded at the top of a tall trunk. Prune tree roses as you do Hybrid Teas, cutting the branches to within 6 to 10 inches of the base of the crown in order to encourage rounded, compact, vigorous new growth.


Miniature roses are 6 to 12 inches high, with tiny blooms and foliage. Miniature roses do not need special pruning. Just cut out dead growth and remove the hips.


Old-fashioned Rambler roses have clusters of flowers, each usually less than 2 inches across. They often produce canes 10 to 15 feet long in one season. Ramblers produce best on year-old wood, so that this year’s choice blooms come on last year’s growth. Prune immediately after flowering. Remove some of the large, old canes. Tie new canes to a support for the next year.


Large-flowering climbing roses have flowers more than 2 inches across, borne on wood that is 2 or more years old. Canes are larger and sturdier than those of Ramblers. Many flower just once in June, but some, called ever-blooming climbers, flower more or less continuously. This group should be pruned in autumn, any time before cold weather sets in. First cut out dead and diseased canes. After this, remove 1 or 2 of the oldest canes each season to make room for new canes. The laterals, or side shoots, are shortened 3 to 6 inches after flowering. If the plant is strong, keep 5 to 8 main canes, which should be tied to the trellis, fence, wall, or other support. If it is not strong, leave fewer canes.


Pruning Shade TreesTop

Young shade trees may not need to be pruned to develop a good framework. Mature trees are generally pruned only for sanitation, safety, or reasons of size restriction. Trees can be pruned at any time of the year. A few trees bleed profusely when pruned in late winter. Among these are dogwood. The bleeding has no harmful effect, but is unsightly. In winter, an experienced tree professional can easily distinguish between live and dead wood. Winter pruning is often preferred because it is easy to visualize shaping when foliage is gone. Such work can also be done at lower cost in winter because fewer precautions are necessary to avoid garden and flower bed damage, and cleanup is easier.


Pruning Vines and GroundcoversTop

The pruning of ornamental vines is similar to the pruning of ornamental shrubs. Flowering vines are pruned according to flower production; those that flower on new wood are pruned before new growth begins, those that flower on last season’s growth are pruned immediately after flowering.


Vines that are grown for foliage are pruned to control growth and direction. Timing is less critical than for flowering vines.


Ground cover plants require very little pruning. Dead or damaged stems should be removed whenever observed. Some trailing ground covers, such as English ivy, may need pruning to prevent encroachment on lawn areas or other plants. With liriope, a grass-like ground cover, appearance is improved by an annual pruning. Before new leaves are an inch tall, remove the dead leaves from the previous year. For large liriope plantings, a lawnmower set to cut above the new leaf tips will speed this early spring job.

https://ag.arizona.edu/pubs/garden/mg/pruning/hedges.html

What can be done about “Winter Kill”?

Standard

“Winterkill” is a general term that is used to define turf loss during the winter. Winterkill can be caused by a combination of factors including crown hydration, desiccation, low temperatures, ice sheets and snow mold. Because of the unpredictability of environmental factors and differences in other factors such as surface drainage, the occurrence of winterkill on golf courses is variable and can vary greatly between golf courses and even across the same course.  Click on the link below for the full article from Michigan State University.

How do I handle winter kill of my turf grass?

Lawns by L.E.W. can help you fight the affects of winter kill on your lawn in southeast Michigan.  Give us a call!  248.217.4417.

Lawn Equipment Must-Haves for Home Owners

Standard

Hose

If you can afford it, buy two hoses; there may be times you want to multi task, such as running a sprinkler while you wash your car, fill a pool or rinse a pet. Measure the various distances you may need a hose to reach and buy hoses a few feet longer than you need. Purchase a nozzle attachment that lets you turn your hose into a sprayer. This will help with watering and debris removal.

Sprinklers

If your lawn doesn’t come with an irrigation system, invest in some sprinklers to help keep your lawn watered and green. Don’t go cheap; $3.99 sprinklers aren’t worth the hassle if they break, leak and cause you to go back to the store for a replacement. A good lawn sprinkler can last you for years. Look for a timer you can place on your faucet for convenient watering. You’ll have to turn your faucet, but a timer will prevent overwatering if you forget to turn off your sprinklers after your lawn gets adequate water.
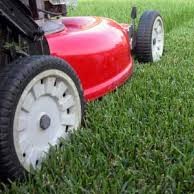
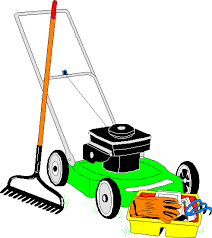
Lawn Mower

If you’re doing your own grass cutting, purchase a self-propelled mower to make weekly mowing easier. Buy a mower that gives you the option to bag clippings or mow without one to mulch your grass. If you have a larger lawn, you may want a tractor or zero-turn radius mower. Tractors are better suited for hilly terrain, while ZTRs provide more maneuverability in yards with a number of tight spaces.

Shovels

Invest is a good spade or two, including square and round tips shovels. Buy a small hand tool for getting into tight spots or moving small amounts of dirt.

Clippers

Buy small hand clippers for cleaner cuts and healthier plants. Using large hedge clippers on shrubs, bushes, vines and plants will create ragged cuts that stress plants.

Gloves

Invest in a good pair of work gloves to keep your hands clean and reduce injuries. Working with pinecones, rocks, sticks and other debris can results in nicks, cuts, splinters and other wounds. Work gloves also provide a non-slip grip as you work with heavy objects and help prevent blisters. You may also surprise bugs, wasps or other pests as you’re working in the dirt, and gloves will prevent bites and stings.

Bags

Have an ample supply of heavy-duty plastic and paper bags for refuse, such as grass clippings, leaves and sticks. Check your city’s or town’s website for their refuse policy and make sure you use the correct bags to dispose of yard debris.

Ladder

If you’re thinking of borrowing a neighbor’s ladder the few times you’ll need one, you may be surprised how often you’ll have to use one. You may need to clean leaves from gutters, get on your roof to remove debris, power wash roof tiles or gutters, trim high tree branches or hang Christmas lights. Invest in a sturdy, stable ladder that will support not only your weight, but also any items or items you bring up with you. Measure carefully before you buy; a ladder that’s even a foot or two short can be frustrating and lead to hazardous situations as you try to boost yourself that extra distance.

Gas Container

Purchase a small container for buying gas for your lawn mower or other items that require gas. Don’t use a homemade container; most gas stations won’t let you fill one.

Rake

Even if you don’t have trees or leaves to remove from your lawn, a rake comes in handy for removing a variety of debris. In addition to a traditional rake, consider buying a thatch rake if you intend to manage your own lawn. Each fall, you’ll want to thatch rake your lawn, removing excess grass clipping, leaves and other debris that can build up and choke your grass. Thatch raking is especially important if you plan to re-seed in the fall.

Spreader

If you plan on doing your own fertilizing and seeding, purchase a spreader. This will help you quickly and evenly apply weed and feed, pre-emergent, fungicide or seed throughout the year. You can purchase a small hand seeder, which you crank with a handle as you walk, or a larger seeder with wheels you push in front of you.

http://www.ask.com/explore/essential-lawn-equipment-new-homeowner